Third Party Services
This document is still a work in progress, see #43.
Stripe
Todo
Used in: development, production
- Go to stripe.com and create a new account, or log in to an existing one.
- Click on your profile picture in the upper right corner and then on
account settings - Select the
API Keystab and copy the test and live keys.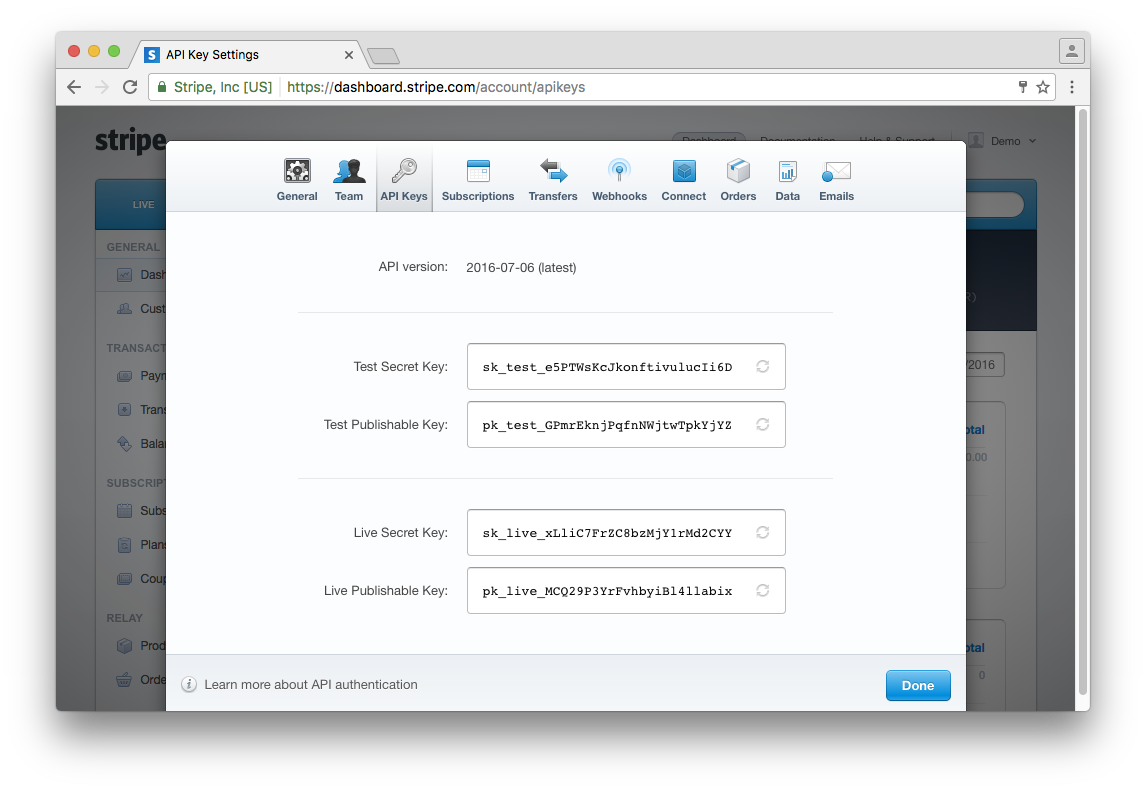
- Test keys for
developmentare going intoconfig/settings/local.py:- Test Secret Key goes into
PINAX_STRIPE_SECRET_KEY - Test Publishable Key goes into
PINAX_STRIPE_PUBLIC_KEY
- Test Secret Key goes into
- Live keys for
productionare going into.env. If you are in beta, you can use your test keys here too.- Live Secret Key goes into
PINAX_STRIPE_SECRET_KEY - Live Publishable Key goes into
PINAX_STRIPE_PUBLIC_KEY
- Live Secret Key goes into
Octobat
Todo, see #43
Used in: development, production
- Go to www.octobat.com and create a new account, or log in to an existing one.
- Click on the chevron in the upper left corner and then on
API Keys & Webhooks - Select the
API Keystab and copy the test and live keys.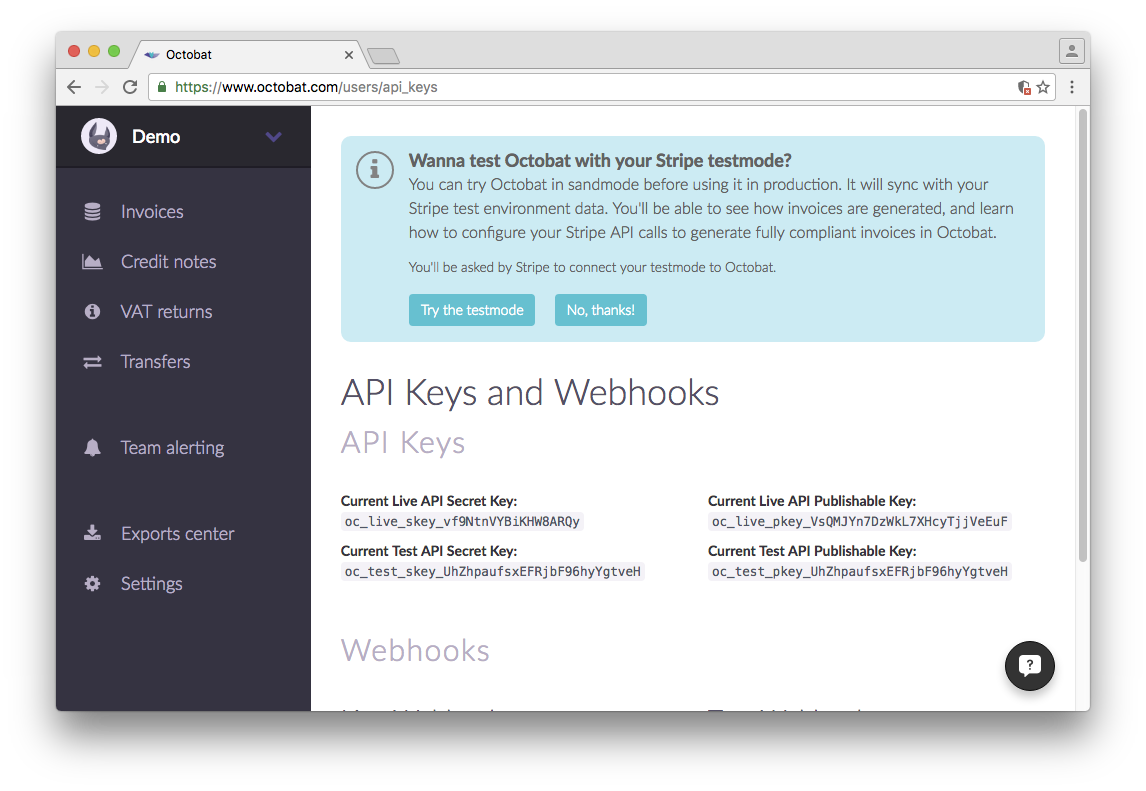
- Test keys for
developmentare going intoconfig/settings/local.py:- Current Test API Secret Key goes into
OCTOBAT_PRIVATE_KEY - Current Live API Publishable Key goes into
OCTOBAT_PUBLIC_KEY
- Current Test API Secret Key goes into
- Live keys for
productionare going into.env. If you are in beta, you can use your test keys here too.- Current Live API Secret Key goes into
OCTOBAT_PUBLIC_KEY - Current Live API Publishable Key goes into
OCTOBAT_PRIVATE_KEY
- Current Live API Secret Key goes into
Sentry
Todo, see #43
Used in: production
- Go to getsentry.com and create a new account, or log in to an existing one.
- Click on the
New Projectbutton and fill in a name.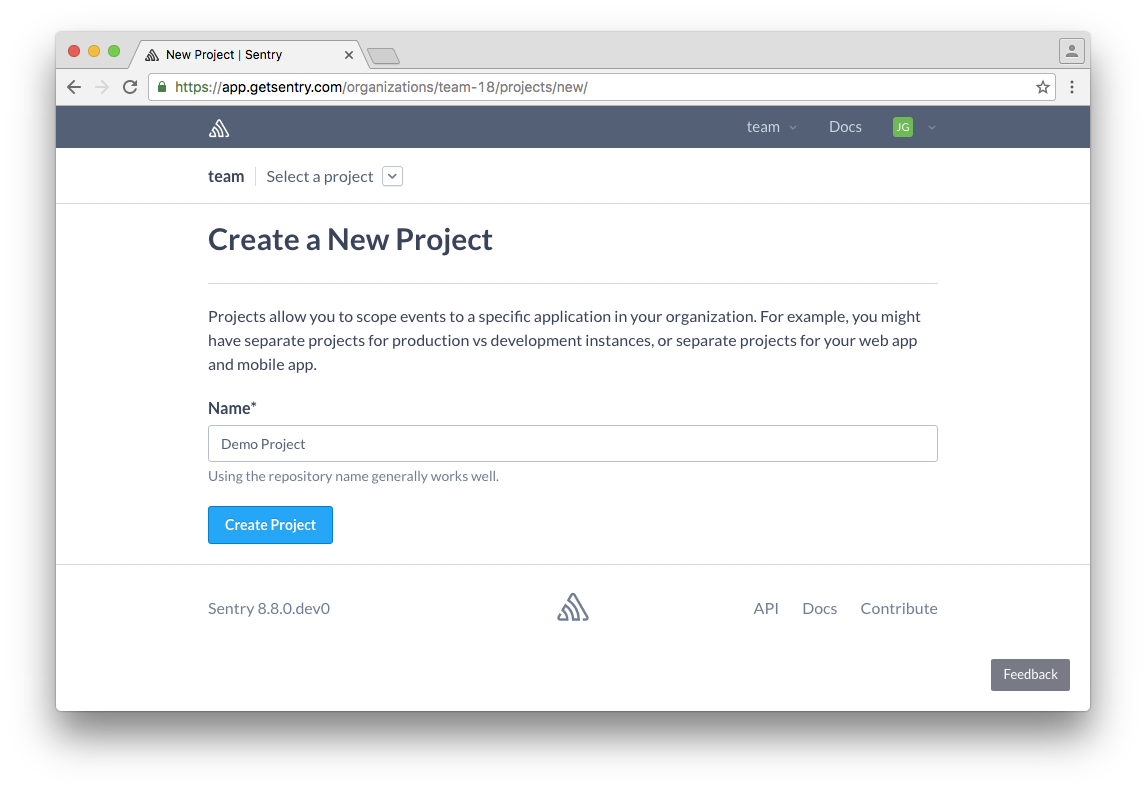
- On the “Configure your application” screen click on
Django. - Scroll down until you see the declaration of the
RAVEN_CONFIGdictionary.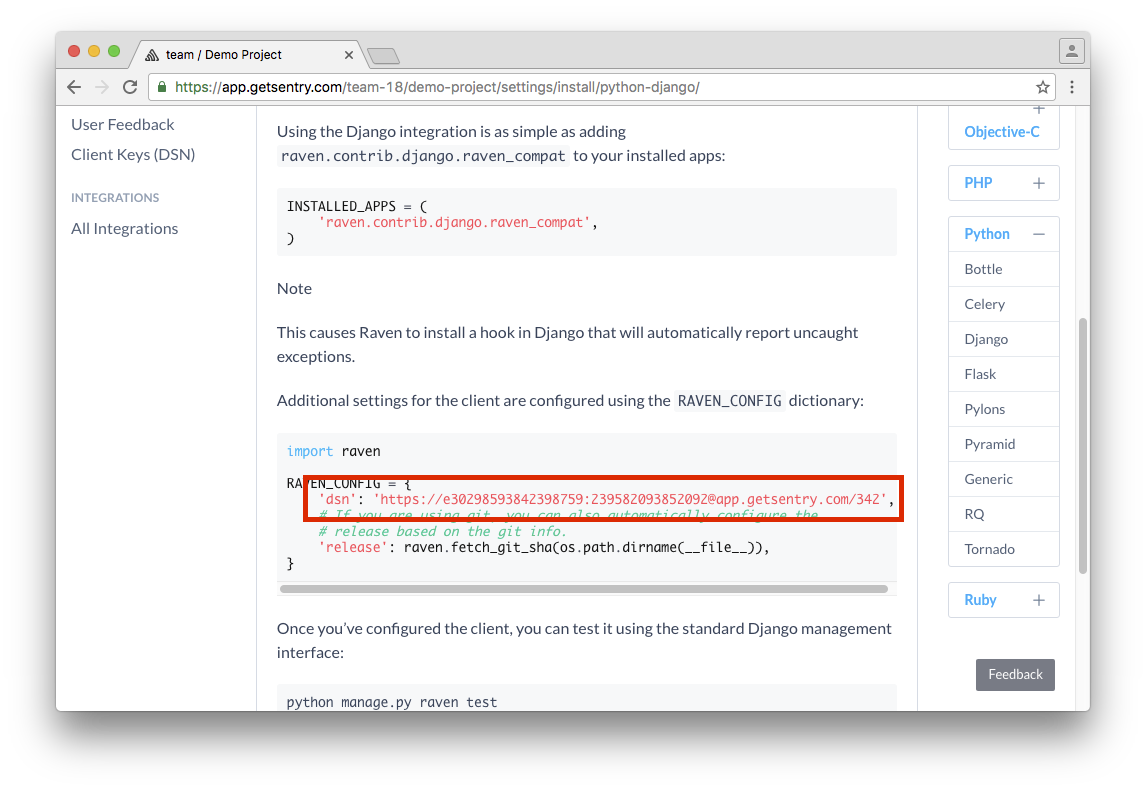
- Copy the
dsninto the.envfile atDJANGO_SENTRY_DSN.
New Relic
Todo, see #43
Used in: production
- Go to newrelic.com and create a new account, or log in to an existing one.
- Click on your profile in the upper right corner and then on
Account Settings. - Your license key is on the right side.
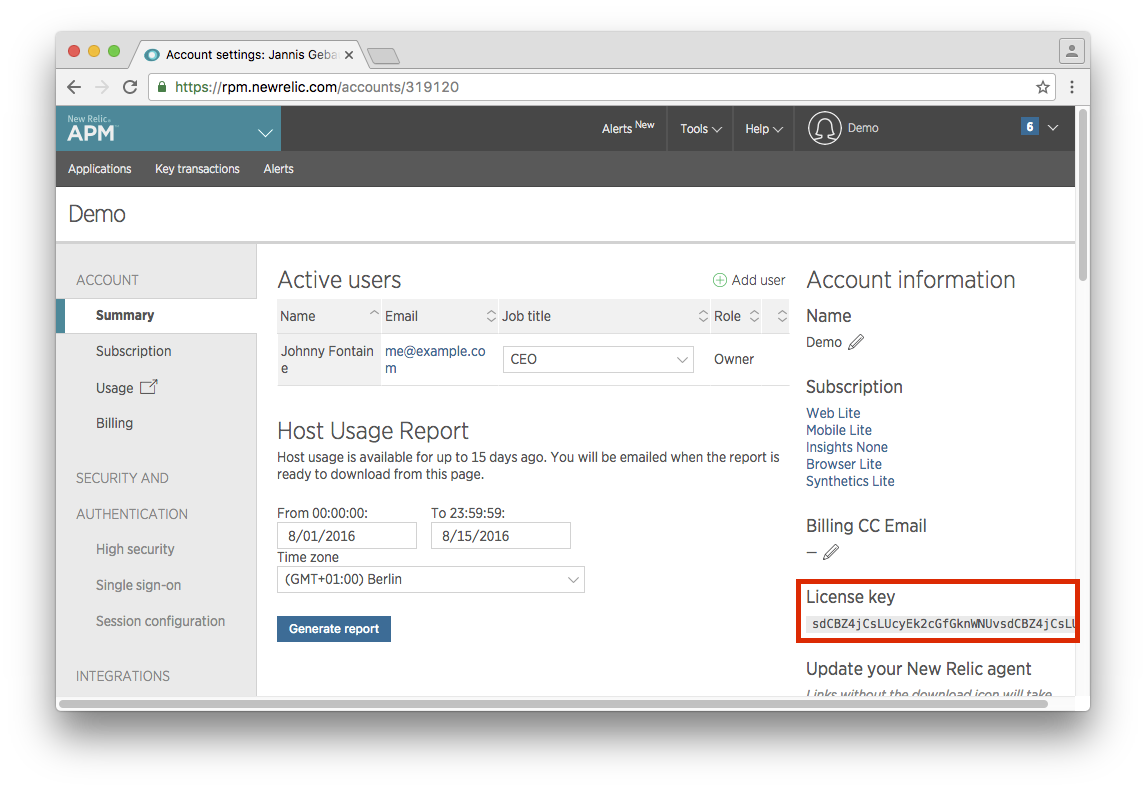
- Copy the license key into the
.envfile atNEW_RELIC_LICENSE_KEY.
Mailgun
Todo, see #43
Used in: production
- Go to mailgun.com and create a new account, or log in to an existing one.
- Click on the
Add New Domainbutton to create a new domain.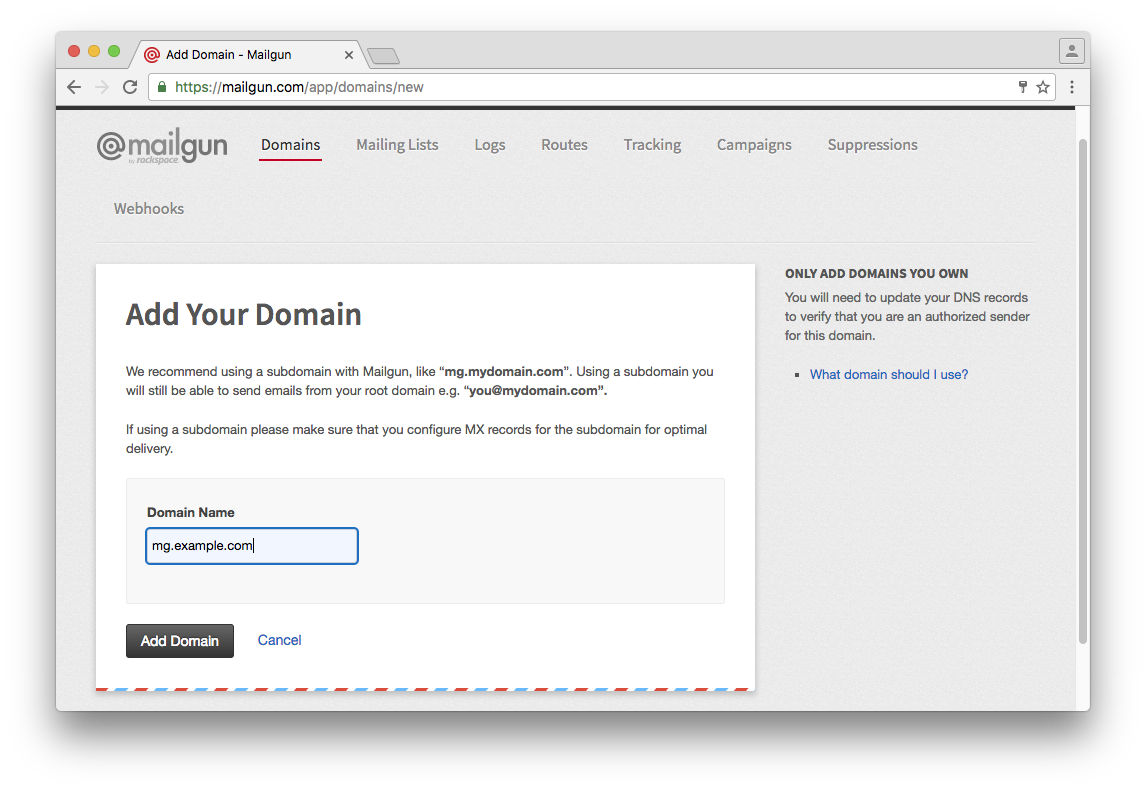
- Follow the steps on the next page to set up your DNS records.
- Scroll down and click on the
Continue To Domain Overviewbutton. - Locate your API key under domain information.
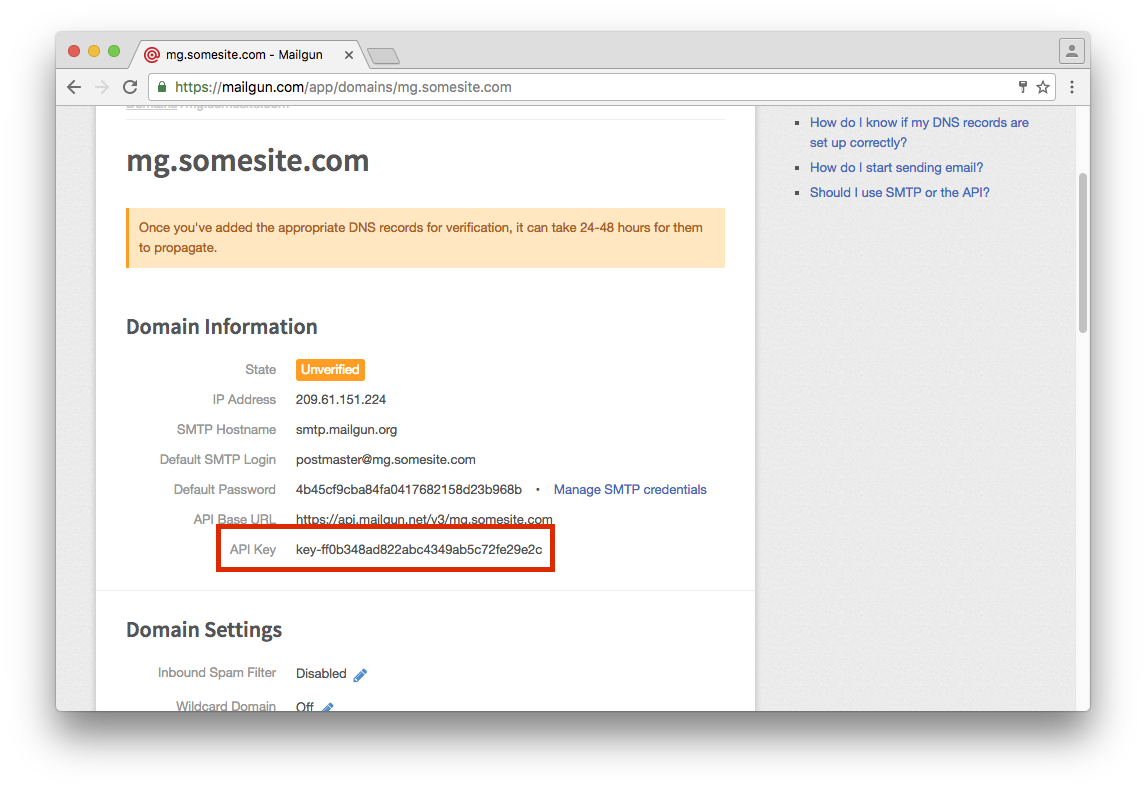
- Copy the API key into the
.envfile atDJANGO_MAILGUN_API_KEY.
Mailchimp
Todo, see #43
Used in: production
- Go to mailchimp.com/ and create a new account, or log in to an existing one.
- On your dashboard, click on
View lists.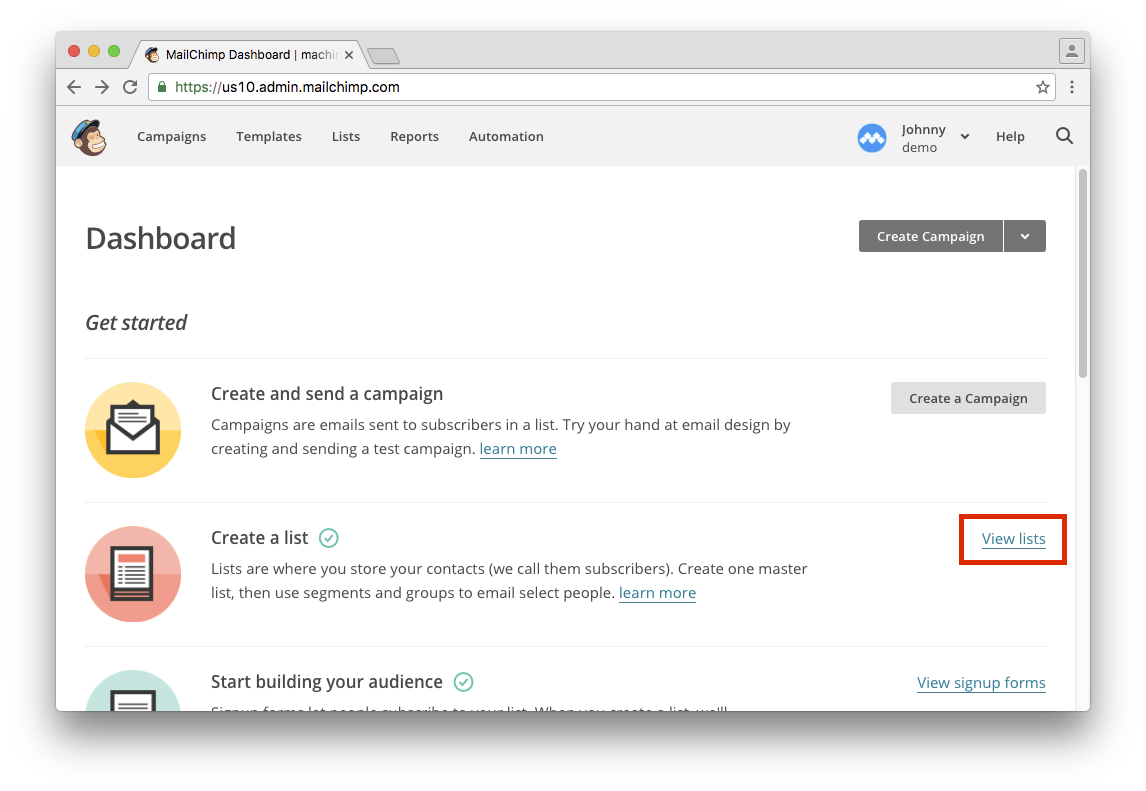
- Click on
Create Listto create a new list for your site.
- Fill in the details and click on
Saveat the bottom of the form. - Click on
Settings>List name and defaults. The list ID is on the right side.
- Copy the list ID into the
.envfile atMAILCHIMP_LIST. - Next, click on your profile menu in the upper right and then on
Profile. - Click on the
Extrastab and then onAPI keys. - If you haven’t already, click on
Create A Key.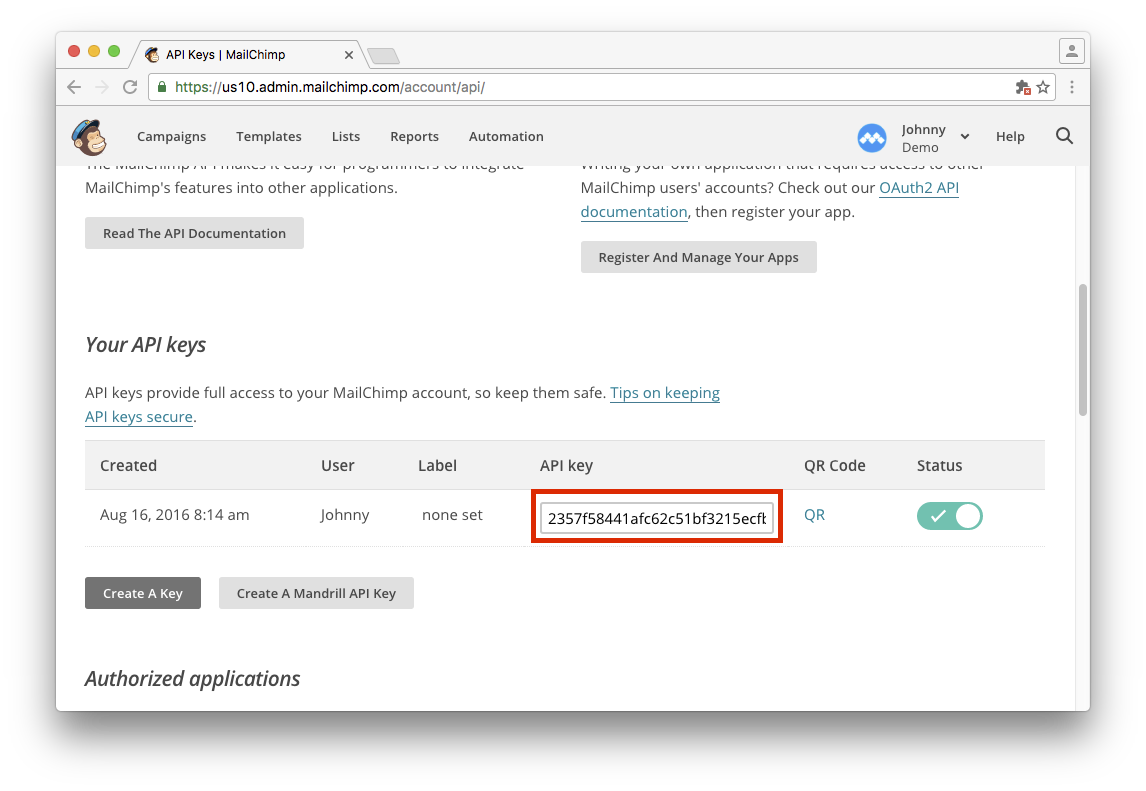
- Copy the API key into the
.envfile atMAILCHIMP_API_KEY.